Drawing a skull can be intimidating, but it doesn’t have to be. With the right techniques and a little bit of knowledge, anyone can learn to draw skulls effectively. In this full guide, we will teach you everything you need to know about skull design and illustration, from the basics of anatomy to more advanced techniques. Once you have mastered these basics, you will be able to create stunning skull illustrations that will make your designs stand out from the crowd. So what are you waiting for? Start learning today!
Skull Anatomy
Skull anatomy is one of the most fascinating aspects of drawing and designing. In this tutorial, we will show you how to draw a skull from scratch, using basic shapes and shapes that you can use to create the different parts of the skull. We will also give you tips on how to create realistic details in your skull illustration.
First, start by sketching out a rough outline of the skull using circles and triangles. Make sure to include the basic shape of the head, as well as the angles at which the bones are positioned. Try not to get too detailed in your sketch – you’ll want to be able to erase it later if necessary.
Once you have your outline ready, start adding some basic details like eyes, ears, and nostrils. Be sure to exaggerate these features slightly so they look more realistic. Once you’re happy with your initial sketches, begin adding in layers of color until you have a finished illustration resembling a real skull!
Drawing the Head
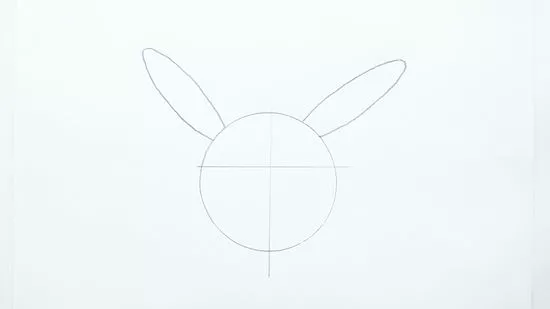
Step 1
Start by sketching out the basic head outline using a soft pencil. Notice how the skull is widest at the back and tapers down to the nose and mouth. Add some light shading to the forehead, temples and around the eyes.
Step 2
Next, use a Technical Pencil to add in details such as eye sockets, cheekbones and teeth. use a light touch when drawing these features so that they remain subtle. Remember to also add any texture or wrinkles to the skin.
Step 3
To finish off, use a softer brush to paint in any highlights or shadows on the head. Use cooler tones for sharper outlines and warmer tones for more blended shapes. Finally, add a bit of extra shading around the eyes and mouth if desired.
How to Draw Eyes
First, start with a basic circle for the eye. Next, add in some basic details such as pupils and a lash line. Use a light pencil to sketch in the roundness of the eye before adding in more contours with a darker pencil. Next, add in the whites of the eye using a light brush. Add extra detail around the pupil by drawing small circles and then blending them into the main shape of the eye. Finally, add in any other features such as eyebrows and lashes and you’re done!
How to Draw a Nose
In this tutorial, we will be learning how to draw a nose. The nose is arguably the most important facial feature because it is responsible for studying and smelling. In order to create a realistic nose, you will need to understand the following anatomy:
The nostrils are located on either side of the bridge of the nose. They are surrounded by cartilage and skin, which helps protect them from Arctic colds and debris. The septum divides the nostrils into left and right sides. Each side has four subdivisions called turbinates (singular: turbin). These small bumps handle air intake and release during breathing. The nostril width determines a person’s personality – broader noses indicate a more aggressive or dominant nature.
1) Begin by sketching out an outline of the nose using guidelines as shown in the diagram below:
2) Next, begin to add in some details such as the nostril openings, septum, and turbinates. Start with simple shapes like circles then refine them until they look realistic. Remember to use light and dark shades to help define different areas of the nose.
3) To create a more lifelike appearance, add veins around the edges of the noses as shown in image 2 below:
4) Finally, give your Nose a final wash of colour with a brush or even pencil to bring everything together
How to Draw a Mouth
How to Draw a Mouth
When it comes to drawing the human mouth, there are a few things to keep in mind. First and foremost, always start with an outline of the lips. Next, add in the curves and creases of the tongue. Finally, fill in any other details like teeth or nostrils. Here are some tips on how to do each step:
1) Start by sketchesing out the basic outline of the lips using thin lines. Be sure to include both the upper and lower lips.
2) Add in the curves and creases of the tongue using thicker lines. Note that this area should be slightly concave, as it would curve around objects inside the mouth such as teeth.
3) Finally, add any other details like teeth or nostrils into your sketch. Remember to give each area its own distinctive shape and size.
How to Draw Teeth
Assuming you’re already familiar with the basics of drawing circles and lines, let’s take a look at how to draw teeth. Teeth are composed of concentric circles – the outermost being the largest, and the innermost being smallest. Notice that these circles are not perfectly round – they have a slight inward curve. When drawing teeth, start by sketching out the outline of each tooth in pencil, then fill in the details with a light-colored pencil. Be sure to vary the size and shape of each tooth – one tooth may be slightly larger than another, or have a different shape. Once all of your teeth are drawn, you can go back and adjust their positions accordingly using your stroke thins and strokesensors.
Tips for Drawing a Skull
There are a few tips for drawing skulls which will help to create a realistic looking design.
1. Begin by drawing the basic shapes of the skull using short, choppy strokes. Use dark tones to create a more realistic appearance and avoid using too many light shadows as this can make the skull look unrealistic.
2. Next, add in some details such as eyes and teeth by drawing small circles and ovals with darker tones. Be sure to vary the size and shape of these details to create a unique look for your skull.
3. Finally, add any final touches such as hair or feathers to complete the design. Use thin lines and curves to achieve a realistic effect, and remember to stay consistent throughout each part of the skull so that it looks cohesive overall.
What is skull design?
Skull design is all about finding the right balance between intricacy and simplicity. It’s important to remember that a skull should be easy to understand from any angle, so keep your lines clean and sharp. You also want to make sure the design is versatile enough to work in different contexts, like logo designs or web graphics. Here are a few tips for creating an effective skull design:
1. Start with a simple shape
Don’t try to create too many details at first, since this will only complicate the final product. You can start by sketching out a basic outline of the skull using circles or rectangles. Once you have a rough idea of how it will look, you can start adding more detail.
2. Use angles for contrast
Angles add visual interest and help viewers focus on specific parts of the design. A good way to achieve this effect is to use angles that are different degrees or directions. For example, you could create a concave angle on one side of the skull and convex angles on the other side. This will give your design some unique structure and make it stand out from other abstract shapes.
3. Use layers for complexity
Adding more layers can help you create more complex designs without having to worry about losing clarity or accuracy. By stacking different shapes together, you can create depth and complexity that would otherwise be difficult to achieve alone. Be careful not to overdo it though — too much layering can result in an opaque
The different types of skulls
Skulls are one of the most popular subject matter for illustrators and graphic designers. They’re versatile, creepy, and can be used to represent a wide range of emotions and concepts. In this article, we’ll discuss the different types of skulls and give you some tips on how to create them using different drawing techniques.
There are three main types of skulls: human, animal, and monstrous. Human skulls are the most common, but there are also animal skulls (mostly from mammals) and monstrous skulls (usually from monsters or creatures in mythology).
Human Skulls
The human skull is probably the most well-known type of skull. It’s simple but recognizable, with a round head with a nose and mouth placed centrally on the face. The top of the skull is usually flat or slightly rounded, while the bottom is curved downward toward the chin. The forehead is usually high and narrow, while the eyebrows are usually thin and joined in a line above the eyes. The eye sockets are small (usually just large enough to fit an eyeball) and located symmetrically on either side of the head. The forehead often has wrinkles or creases running down it, which indicate age or stress (depending on what era the skull was from).
To draw a human skull, start by sketching out a basic outline using a light pencil or pen. Then fill in the basic details using a harder pencil or pen, including the outline of
How to draw a realistic skull
Creating a realistic skull can be tricky, but with the right tips it can be easy. Follow these steps to get started:
1. Begin by sketching out a basic shape on paper. Don’t worry too much about the details at this stage, just focus on creating a rough outline of the skull.
2. Once your outline is complete, begin to fill in the details with thin lines and brushstrokes. Be sure to pay close attention to the angles and curves of the skull structure, as these will play a big role in its realism later on.
3. Next, start refining the details by adding additional lines and shapes to highlight specific areas of the skull (e.g., eyeballs, teeth). Be sparing with your use of color at this stage – you want to keep things simple so that you can concentrate on accuracy later on.
4. Once everything looks good to you, it’s time to add some final touches – like wrinkles or cracks in the skin – and finish up by painting over any stray lines or marks. Allow your artwork to dry completely before moving forward!
Tips for drawing a human skull
When drawing a human skull, it is important to start with a basic outline of the head and then work inwards. The following tips will help you create a realistic skull!:
1. Begin with an outline of the head using simple shapes such as circles or squares. Use caution not to over-draw the outlines – you just want to create a basic shape for your skull.
2. Next, add in details such as eyes, nose, and mouth. Be sure to make these features distinct from each other by using different sizes and shapes for each element.
3. Finally, fill in any remaining areas with light and shadow until your skull looks realistic. Use highlights and darks to create highlights and shadows on the bone structure, respectively.
How to draw a cartoon skull
This tutorial will show you how to draw a cartoon skull. The skull can be used for illustration or graphics design projects, or simply as an abstract design element.
To start, sketch a basic outline of the skull using simple shapes and curves. Make sure to keep the proportions correct – the head should be slightly larger than the body. Once the outline is complete, fill in the details using darker colors and strokes. Use light strokes to create highlights and shadows on the bones.
To finish, add a final layer of color and pattern around the skull. Use different shades of gray, white, and black to create a realistic look without having to rely on Photoshop or other photo-editing software. Have fun with this tutorial and be creative!
Conclusion
When it comes to drawing skulls, there are a few things you need to keep in mind. First and foremost, make sure the skull is realistically proportioned. Second, be creative with your shading and lighting techniques. Finally, use illustrative elements—like eyes and teeth—to create an eerie effect that will set your work apart from the competition. In this tutorial, we’ll show you how to draw a skull step-by-step using basic illustration principles. So get ready to terrorize your friends with some amazing skulls of your own!