The ox cow is a common motif in medieval art. Oxes were necessary for the production of not only food, but also cloth, rope and other materials. Drawn from life, ox cows are expressive and beautiful works of art. This tutorial will show you how to create an ox cow drawing step-by-step, using simple lines and shading to create a lifelike image.
How to draw an ox in a simple step by step guide
The ox is a majestic animal and one that is often used in works of art. This tutorial will show you how to draw an ox in a simple step by step guide. The steps are easy to follow and the end result is a well drawn ox.Start by sketching out the basic outline of the ox using pencil. Make sure to add in the details such as horns, eyes, and ears. Once you have the outline completed, begin shading in the ox’s fur using a light color. Next, fill in any areas that need more detail with a darker color. Finally, add highlights to the highlights on the ox’s fur and give it a final coat of paint or correction fluid.
How to make the ox look realistic
There are many techniques that you can use to make an ox look realistic. One of the most popular methods is to use a pencil and paper to sketch out the outline of the ox before transferring it to a painting or drawing surface. Once you have your outline, you can begin to fill in the features of the ox with charcoal or pencil. You can also add shadows and highlights to help bring out the details on the ox’s fur, horns, and eyes. Once you are finished, you can then erase any unwanted lines or marks from your drawing.
What you will need
In this tutorial we will cover how to create a simple ox cow drawing with easy steps. You will need a pencil and paper for this tutorial.
1. Start by sketching out your basic outline of the ox with a pencil on paper. Don’t worry too much about perfectness at this stage, just try to capture the general shape of the ox.
2. Next, start adding in some details to your ox drawing by shading it in using light and dark strokes. Be sure to use different tones and shades to help define different parts of the ox’s body.
3. Once you’re happy with the look of your ox drawing, take some time to clean up any mistakes you made along the way by retouching any areas that need it.
4. Finally, add some finishing touches to your ox drawing by making sure everything is properly aligned and centred within the frame of your sketchbook page, then give it a final stamp of approval with a signature or other text!
How to draw an ox
In this tutorial, we will show you how to draw an ox from start to finish. The ox is a simple figure that is often used to illustrate concepts such as strength, power, and size. Once you have learned how to draw the ox, you can use it for any purpose that requires a simple, yet powerful image.
1. Begin by drawing the basic outline of the ox with a pencil on paper. Use basic shapes to begin with; don’t worry too much about accuracy at this stage.
2. Next, add in some details to the ox’s body using a light pencil or brush. Use broad strokes to create the outline of the ox’s muscles and fur. Be sure to add layers of detail as you go along; this will help give your ox character and life.
3. Next, begin adding details to the ox’s head using a heavier pencil or brush. Start by outlining the eyes and mouth and then continue filling in those areas with finer lines until your ox looks realistic.
4. Finally, add finishing touches to your ox by shading its fur and muscles using darker tones of pencil or brush. The goal is for your Ox Cow Drawing Tutorial step by step easy | full guide to look like a real animal ready for illustration purposes!
How to draw an ox head
An ox head is one of the simplest and most recognizable animal drawings. It’s a simple head with big horns and a blank stare. Whether you’re sketching out ideas for an art project or just trying to get practice in your drawing, this tutorial will help you create an ox head that looks accurate and professional.
1) Start by sketching out your basic outline of the ox head. Use long, sweeping lines to create the outline of the horns, the forehead, and the jawline. Be sure to leave plenty of room for detail later on.
2) Next, start adding in some details around the edges of your outline. Start with the horns, creating sharp points along each edge using a light brushstroke. Then add in small Details around the brows and jawline using a darker brushstroke.
3) Now it’s time to start filling in the details inside your outline. Begin by outlining each horn again with a lighter brushstroke, then fill them in with a darker color using circular strokes. Add extra highlights along the tips of each horn using a soft brush. Finally, add some subtle shading to give your ox head depth and realism.
4) To finish up, add final details to the face including eyebrows, eyelashes, and whiskers. Be sure to use delicate strokes so that you don’t over-exaggerate any features. And there you have it – an accurate ox head drawing that you can use for all sorts of
How to draw an ox tail
ox tail is one of the most common shapes in the animal world. It’s easy to draw and doesn’t require a lot of precision. In this tutorial, we’ll show you how to draw an ox tail step by step.
1) Start with a basic oval shape. Make sure that the width is equal on both ends and that the height is about twice as long as it is wide.
2) Now add some details to the ox tail using a light pencil or brush. Notice how the end curves upwards and tips slightly towards the backside of the ox. Add small circles at each end to help define it further.
3) Next, use a darker pencil or brush to create shadows along the Ox Tail’s length. This will give it depth and strength. Don’t overdo it though, because too much shadow can make your ox look dark and foreboding instead of cute and cuddly!
4) Finally, add some highlights to individual areas using a light colored pencil or brush. This will bring out all of the features in your ox tail including its horns, ears, and eyes!
How to draw an ox body
Step 1: Draw the basic outline of ox’s body. Start by drawing a line from the base of your ox’s neck to the top of its tail. Add another line above that to represent ox’s shoulder blades. Now draw two more lines down from the shoulder blades to create ox’s ribcage. Finally, add a few short lines below the ribcage to create ox’s hips and legs.
Step 2: Next, fill in ox’s body with dark brown shading. Use a medium or soft brush to apply the shading, making sure to focus on areas that will be highlighted later in the tutorial (like ox’s head and horns). Don’t worry about getting too detailed at this point – you can refine your shading later on if necessary.
Step 3: To create ox’s eyes, start by drawing a small circle near the top of each nostril. Make sure both circles are slightly curved inward, and then use a black shade to fill them in. Finally, add a few light-colored eyelashes near each eye pupil using a black brush tip.
Step 4: To create ox’s horns, start by sketching out their basic shape using a light brown pencil. Once you have the basic shape down, use a darker brown shade to begin adding details like bumps and ridges. Be sure to experiment with different angles and shapes to get realistic results!
Step 5: To finish up ox’s head, start by drawing two long horizontal lines
How to draw an ox hooves
This is a tutorial on how to draw an ox hooves.
1. Begin by drawing a basic oval shape for the ox’s hoof. Make sure the base of the oval is slightly wider then the top. The width of the oval will determine the size of the ox’s hoof.
2. Next, add in some rudimentary details to the ox’s hoof such as veins and nails. Be sure to make these details as detailed as possible so that they stand out from the rest of the hoof.
3. Finally, add in any other details that you feel are necessary for your ox hooves drawing such as horns or whiskers.
How to finish your ox drawing
To finish your ox drawing, you will need to add a few finishing touches. First, use a brush to add highlights and shadows to the animal’s features. Next, use a light color to shade in the ox’s body and horns. Finally, add details using a darker color. Here are some tips for completing your ox drawing:
1. Start by sketching out the general outline of the ox on paper. Use simple shapes to capture basic features such as the animal’s head, body, and horns. Don’t worry too much about accuracy at this stage; you can revise your work later if necessary.
2. Once the outline is complete, begin adding highlights and shadows using a brush. Use varying degrees of opacity to create realistic effects. Be sure to experiment with different methods and techniques until you find something that works well for you.
3. To add depth and shading to the ox’s body, start by darkening the areas around its midsection and gradually lightening the areas near its head and horns. You can also use lighter values in these areas to create highlights or highlight specific elements within the image.
4. To create fine details on the ox’s features, use a darker color in conjunction with a light brushstroke technique. Work carefully so that all of the small details are highlighted correctly without creating Too Much Detail (TOD). This is an important step
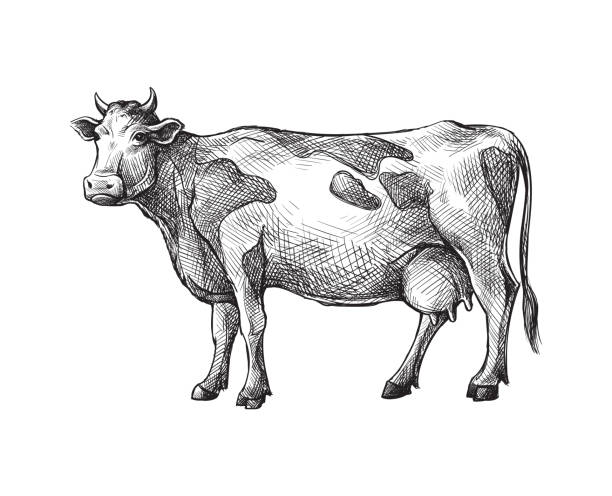
What is Simple OX Cow Drawing?
In this tutorial, we will show you how to draw an ox cow in Simple OX. This is a very simple and easy-to-follow tutorial, which will help you learn the basics of drawing oxen. First, create a basic block outline of the ox’s body using a few lines. Next, add in some details using strokes and fills. We hope you find this tutorial helpful!
How to do Simple OX Cow Drawing Tutorial?
1. Firstly, you will need to open up a new document in your standard drawing program and then set the size to whatever you want your finished drawing to be. I’ve used A4 here, but feel free to adjust as needed.
2. Begin with a basic outline of the cow’s body, using a soft pencil or pen. Don’t worry too much about accuracy at this stage – just get an idea of where everything is going to go.
3. Once you have the outline down, start filling in the main features of the cow with a bit more detail – the head, neck, body and legs should all be drawn in separately. Pay particular attention to making sure that all angles are correct and that each component looks proportional relative to the others.
4. To finish off, add any final details like eyes, horns and whiskers (if applicable). Remember to use light and delicate strokes for these areas – a heavy hand will only make it harder to create accurate shapes later on!
5. Once everything is complete, take a look at your work in total and make any necessary adjustments or corrections – remember, perfection is not required here but rather an effective and pleasing design!
If you’d like some extra help with this particular tutorial, feel free to check out our full guide below:
How To Do Simple OX Cow Drawing Tutorial Step by Step Easy | Full Guide
What are the Basic Steps in Simple OX Cow Drawing Tutorial?
1. Begin by creating a new document with the default settings in Oxide.
2. Click on the Rectangle tool and draw a rectangle, using the size of your canvas as a guide.
3. Select the Gradient Tool (G) and click on the bottom left corner of your rectangle to open the gradient editor. Drag your mouse up or down to adjust the gradient’s opacity.
4. To add some more color, select the Paint Bucket tool (G) and fill your rectangle with a light blue color (#99d8b).
5. Make sure your gradient is still selected and click on the top left corner of your rectangle to close the gradient editor.
6. Next, we will add some basic shapes to our cow using the Ellipse Tool (L), Polygon Tool (P), and Curved Line Tool (L). Be sure to use different colors for each shape so they’ll stand out when we’re finished!
First, create an ellipse that’s about twice as wide as it is tall by clicking anywhere inside your ellipse then dragging towards the center until it becomes solid. Next, create two smaller ellipses near each end of your original ellipse by clicking and dragging from outside of each ellipse towards its center point – these will be our horns! Finally, using the same technique as before, create two curved lines that connect between each of our horn tips
Tips to Improve Your Simple OX Cow Drawing Skills
There are a few tips that can help improve your simple ox cow drawing skills. Start with a good base sketch. Pay attention to the proportions of the body, head, and horns. Use basic contours and shading to create form. And don’t be afraid to experiment – add different shaped features, textures, and colors to your ox cow drawing.
1: Start with a good base sketch. A good starting point is to draw an outline of the ox’s body using basic shapes and contours. Notice how the proportions are consistent across all parts of the ox’s body.
2: Pay attention to the proportions of the body, head, and horns. The ox’s body should be proportionate in size overall – from its shoulders down to its feet – while the head should be larger than the rest of the body. The horns should also be proportional in size, being smaller on top than they are on bottom.
3: Use basic contours and shading to create form. Add shadows along areas where light would hit (like around eyes), as well as highlights along areas where shadows would be less evident (like around horns). Experiment with different tones and shades to get a feel for what looks best on your ox cow drawing.
4: And don’t be afraid to experiment – add different shaped features, textures, and colors to your ox cow drawing. Be sure not to overdo it though – keep things simple by sticking with basic shapes and shades until you
Conclusion
If you’re looking to learn how to draw an ox in a simple and easy step-by-step guide, look no further! In this tutorial, we will show you everything you need to know to create a great drawing of an ox. From the basics of shading and outlining your ox’s body, to adding detail with its horns and ears, our complete guide has it all covered. So whether you are a beginner artist just starting out or an experienced artist who wants to brush up on your skills, our simple ox drawing tutorial is perfect for you!