Dinosaurs are one of the most popular prehistoric creatures, and for good reason. They’re awe-inspiring and full of personality. Plus, they make great subjects for easy drawings. In this guide, we will show you how to draw a dinosaur step by step using easy to follow instructions. We’ll even include a full guide on how to make your dinosaur look realistic and cute! So get ready to learn some fun dinosaur drawing tips today!
What you will need
To draw a dinosaur, you will need:
-A paper
-Pencil or pen
-Eraser
-Colors of your choice (see the full guide below for a list)
– patience!
How to draw the head
In this tutorial, we will show you how to draw a dinosaur head using simple steps. First, sketch out the basic outline of the head using a light pencil. Then use a darker pencil to add more detail to the skull and eyes. Finally, paint in the colors to create your own prehistoric creature!
How to draw the torso
In this tutorial we will be learning how to draw a torso of a dinosaur. The steps are simple and anyone can follow them, no matter their drawing skills.
1. Begin by sketching out the basic outline of the body using big, strong shapes. Don’t be afraid to rough in some details at this stage – you can always refine them later on.
2. Next, use lightening quick strokes to create the muscles and skin on the torso. Be sure to vary the width and thickness of your strokes so that it looks realistic.
3. Finally, add in any final details like hair and feathers and you’re done!
How to draw the legs and feet
To draw the legs and feet of your dinosaur, start by sketching out a basic outline of each limb. For the legs, use a long line to indicate the lower part of the leg and then use short lines to create the heel and toe. Add details like veins and bumps to make your drawing look realistic. For the feet, start by sketching a small circle for the base and then add in smaller circles for toes and heels. Be sure to give each foot its own unique shape so that your dinosaur looks individualized. Finally, add in any other details like scales or feathers on top of your feet sketches.
How to finish your Dinosaur

There are a few different ways to finish your Dinosaur drawing. Each has its own advantages and disadvantages, so it’s worth experimenting with a few different methods until you find the one that suits your style the best.
The first option is to simply fill in all the remaining details on your Dinosaur, including its eyes, mouth, horns, and tail. This method is usually preferred by beginners because it’s quick and easy to complete.
However, this approach has two main drawbacks: first, it can be difficult to add detailing correctly if you don’t have experience with shading and anatomy; second, it can result in a diagram-like drawing rather than a realistic depiction of a dinosaur.
The second option is to start by sketching out basic shapes for your Dinosaur’s body and head, then gradually filling them in with detailed lines and shades. This approach produces more lifelike results but requires more time and effort to complete.
The final option is to use both methods together: start by sketching out basic shapes using pencil or pen then finish up the details with heavier layers of pen or ink. This allows you to create a realistic picture without sacrificing speed or accuracy.
What you will need
If you’re looking to learn how to draw a dinosaur, look no further! This full guide will show you everything from the basics of anatomy, to tips for realistic shading and textures.
In order to get started, you’ll need some basic supplies. Paints and brushes are always a good start, but you can also find stencils and patterns online or at your local art supply store. Once you have those items ready, it’s time to get started!
The first step is to sketch out your outline of the dinosaur using simple lines and shapes. Make sure that your outline is accurate and detailed enough so that you can easily fill in the details later on.
Once your outlines are complete, it’s time to start filling in the details! Start by painting on the skin tones using light colors, then add darker tones as needed. Next, add in any highlights or areas of highlight on the body using different colors.
To create more realistic shading and textures, use layers of paint until you achieve the look that you’re after. Be careful not to overdo it though – too much texture can make your dinosaurs look cartoony rather than realistic.
When all of the paint is finished, it’s time to start adding in the details! Start by adding small bones and feathers onto the skeletal structure using thin strokes. Be sure to vary the thicknesses of these strokes so that they look lifelike. Then add in larger muscles and other soft
How to Draw a Dinosaur: The Head
Step 1 – Draw the head outline
Start by drawing an oval shape for the head. The oval should be slightly larger than your finished dinosaur’s head, and a little narrower in the middle. Draw the outline of the skull and mouth using a round pencil.
Step 2 – Add details to the head
Now begin to add details to the head. Start by sketching in two small circles for eyes. Add a few more details like eyebrows and whiskers, then finish up with a light line around the eye sockets.
Step 3 – Add shading to the head
To finish off the head, start adding shadows with a soft brush. Use circular or elliptical motions to create depth and highlights. Be sure to vary the intensity of your shadows in different areas of the head, to give it that realistic look!
How to Draw a Dinosaur: The Body
1. First, start by drawing a basic outline of the dinosaur’s body using a light pencil. Remember to make the outline smooth and without too many lines – you’ll be tweaking it later on anyway.
2. Next, add in some basic details such as the animal’s scales and muscle tissue. Use a darker pencil to add in more detail here, making sure to vary the thickness of each layer so that it looks realistic.
3. To finish off the body, begin adding in the head and limbs. Start by sketching out simple shapes for these parts – you don’t need to get too precise at this stage. Once you have these rough outlines, start adding finer details such as eyes, horns and feathers.
4. Finally, add any finishing touches you feel necessary – such as highlights or shadows – then give your dinosaur a final look of approval!
How to Draw a Dinosaur: The Tail
To draw a dinosaur correctly, you will need to understand their anatomy. The tail is one of the most important parts of the body, as it helps balance and propel the dinosaur forward.
To begin, start by sketching out a basic outline of the tail with a light pencil or pen. Next, fill in the bones with a softer pencil or pen to give them more definition. When finished, use a lighter pencil or pen to add highlights and shadows to create depth and realism.
How to Draw a Dinosaur: The Feet
In this tutorial, we will be drawing a dinosaur, specifically its feet. The feet of a Tyrannosaurus rex are some of the most iconic and recognizable parts of the animal, so it is worth spending some time on them!
1) Begin by drawing the basic outline of the foot, making sure to include the ankle and heel. Be sure to also include the wrinkles in the skin that run along its surface.
2) Next, add in some details to the foot, such as the bone structure and tendon bundles. Try to pay attention to how these features work together to create movement.
3) Finally, paint in any final details like skin color and markings. Remember that each individual dinosaur might have looked different, so feel free to experiment with different looks for your foot model!
conclusion
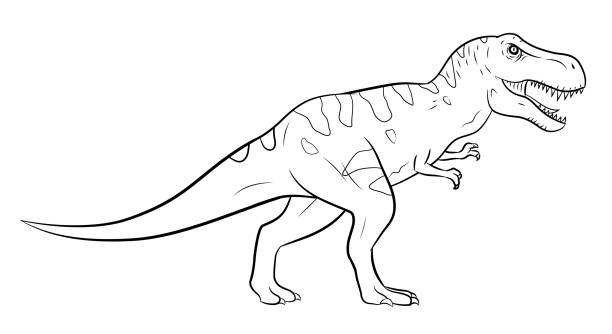
If you want to learn how to draw a dinosaur, this guide is for you! We will show you the steps necessary to create a cute and easy dinosaur drawing. First, start by sketching out the basic outline of your animal using simple lines. Then, add in some simple details like the horns, scales, and feathers. Finally, finish up by adding in the final colors and details. Here’s how it looks:
Good luck learning how to draw a dinosaur! Remember to practice often so that you can create stunning illustrations like this one!