Hands are one of the most popular features that people use in their illustrations and designs. They can be used to represent people, animals, objects, or anything else you can think of. In this tutorial, we will show you how to draw hands using basic shapes and techniques. We will also provide a full guide so that you can improve your skills further. So if you want to learn how to draw hands effectively, start with this tutorial!
The Basic Hand Anatomy
The human hand is a versatile and fundamental tool for both physical and cognitive tasks. In this tutorial, we will teach you how to draw hands step by step, starting with the basic anatomy.
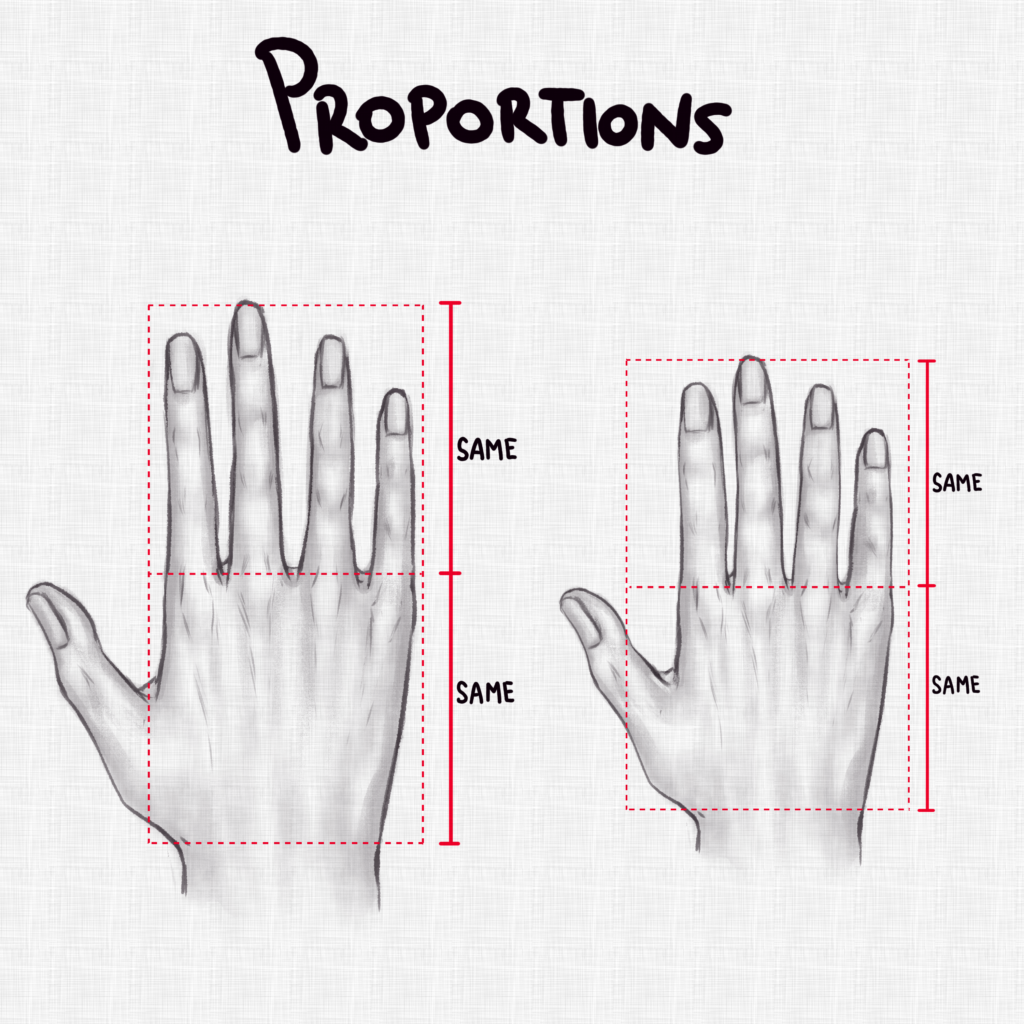
The first step is to divide the hand into its constituent parts: the forearm, upper arm, hand, and fingers. The forearm should be proportionally long and narrow compared to the upper arm; the hand should be slightly larger in relation to the forearm than in relation to the upper arm. The next steps will show you how to sketch out each of these parts using simple lines and curves.
1) Sketch out the outline of the forearm using a curved line. Use light and dark tones to create an illusion of depth.
2) Next, sketch out the outline of the upper arm using a straighter line. Again, use light and dark tones to create an impression of depth.
3) Finally, sketch out the outline of the hand using a series of small circles. Remember not to exaggerate any details – focus on creating a basic shape that’s easy to duplicate later on in your drawing.
4) Next, start shading in each section of your hand using varying degrees of darkness. Use light tones around the fingers and palms, and add more shadow near the base of each finger cap. Be sure to pay attention to shadows created by different angles around your fingers!
5) Once all sections are shaded in, begin adding highlights by outlining each
How to Draw Hands from the Front View
Step 1: Draw the outline of the hand using a light pencil. The fingers should be long and slender.
Step 2: sketch in the basic details of the palm including the thumb, index finger, and middle finger. Make sure to give each finger its own distinctive shape.
Step 3: Add some shading to help define the contours of the hand. Use a darker pencil for areas that will be more detailed, such as the lines around the fingertips.
Step 4: Next, begin to add detail to the fingers and palm. Use a small brush to paint in individual hairs on the hands and lashes on eyelashes. Be creative when painting these details- they can really bring your drawings to life!
How to Draw Hands from the Side View
If you want to know how to draw hands from the side view, follow these easy steps. Start by drawing a basic frame for the hand, using long, horizontal lines. Next, sketch in the veins and tendons on each finger. Finally, add the details like wrinkles and folds in the skin.
How to Draw Hands from the Back View
The hands can be quite tricky to draw from the back view, but with a bit of patience and practice, they can be easily drawn. In this tutorial, we will show you how to draw hands from the back view in simple steps.
Start by drawing a basic outline of the hand using round shapes. Use long, thin lines to create the fingers and palm. Make sure to add a little detail to the fingers and palm so that they look natural. Remember to make the fingers slightly curved inward towards the palm.
Next, add darker lines around the outline to create shadows. To add more realism, use different shades of brown for the shadows and highlights on the skin. Finally, add any other details such as wrinkles or scars on the hand.
Tips for Drawing Hands Easily and Quickly
When it comes to drawing hands, sometimes the simplest solutions are the best. Here are a few tips for easy and quick hands:
1. Start with a basic shape – Start by sketching out a basic shape of your hand, using simple lines and shapes. This will help you get an idea of the overall form before starting to add details.
2. Follow the outline – Once you have your basic shape, make sure to follow the outline of your hand as closely as possible. This will help you keep things simple and consistent.
3. Add detail – Once you have your outline down, start adding in details such as fingers, knuckles, and veins. Be careful not to over-complicate things too much – remember, simplicity is key when it comes to hands!
What you need
If you want to learn how to draw hands, this is the perfect guide for you. In this tutorial, we will show you how to start with simple shapes and then progress to more complex designs.
Step one: Start with a basic circle
The first step is to start with a basic circle. To do this, use the pencil or pen to create a small circle on your paper. Next, sketch in the outline of the hand using short, curved lines. Remember not to over-draw the outline – just make sure it’s enough to help you see where each individual finger starts and ends.
Step two: Add some detail
Now that you have the basic shape down, it’s time to add some detail. Start by adding curves around the base of the fingers and along the palm. Next, add in longer curved lines that flow upwards towards the wrist. Finally, add in smaller details like hairs and veins on the skin.
Step three: Finish up!
Once all of the details are added, it’s time to finish up! Make sure everything looks correct by checking for symmetry and making any final adjustments. Then save your image so that you can continue working on it later on.
How to start
If you’re interested in learning how to draw hands, this guide is for you! In this tutorial, we’ll show you everything from the very beginning steps to more advanced techniques. Whether you’re a beginner or an experienced artist, we hope that our guide can help you learn how to draw hands effectively and efficiently.
To start, we’ll explain the basic anatomy of the hand. Next, we’ll provide step-by-step instructions on how to create each individual finger from scratch. Finally, we’ll give you a few tips and tricks to improve your skills. So let’s get started!
How to draw hands
When you start learning how to draw hands, the first thing that you need to do is learn how to create basic shapes. Once you have a good understanding of these shapes, you can start to add details.
There are a few different ways that you can create hands. The first method is to use simple lines to outline the hand. You can also use circles for the fingers and make sure that the lines are smooth and consistent.
The second method is to use more detailed lines. When drawing hands this way, it is important to make sure that the lines are evenly spaced out and that they curve smoothly.
The final method is to use curves and shading to create realism in your drawings. This type of hand drawing takes a bit more time, but it can result in some really beautiful drawings.
Tips for improvement
If you’re looking to improve your ability to draw hands, start with these tips:
1. Start with simple shapes. Don’t try to get too complicated at the beginning. If you can master simple shapes, you’ll be well on your way to better hand drawings.
2. Practice often. Drawing hands requires a lot of practice, so make sure to work on them frequently! The more often you practice, the better your results will be.
3. Use reference materials. Whether it’s pictures from magazines or paintings by other artists, using reference material is always helpful when drawing hands. It’ll give you a good idea of how hands are typically drawn and help you stay consistent in your work.
4. Use shading and detail to add depth and realism to your drawings. Shading can create a sense of volume and dimension in hands, while detailed shading can add extra detail that helps make them look more realistic. Be creative with both techniques and see what works best for each hand drawing you do!
Conclusion
Drawing hands can be a difficult task for beginners, but with the help of this guide, you will be able to create beautiful and intricate drawings in no time. In addition to providing step-by-step instructions on how to draw hands, this guide also includes helpful tips on drawing different kinds of fingers, as well as tips on rendering hand positions realistically. So if you’re interested in learning how to draw hands correctly, try out this guide today!