Horses have been a part of human society for centuries, and as such, they are an integral part of many cultures. Whether it’s in movies or on TV, horses are often depicted in a positive light. This positive image has led to a surge in horse riding and horse training, which has in turn created a demand for more horses. But this increasing demand has also put the horse industry under pressure. In this blog post, we will provide you with a detailed and easy horse drawing tutorial that will help you create a beautiful horse portrait. By following our guide, you will be able to easily create a drawing that captures the beauty and grace of a horse.
Background
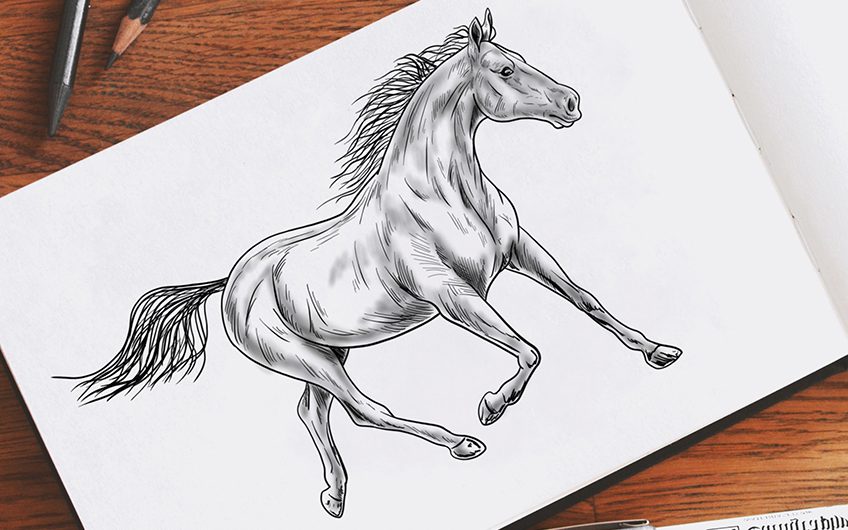
This is a detailed and easy horse drawing tutorial. I will be using pen and paper to illustrate how to draw a horse, but the same basic principles can be applied to any animal drawing.
In this tutorial, we will be covering the following topics:
1) The head and neck
2) The body
3) The legs and hooves
4) The saddle and tack
5) Tips for advanced horse drawing
Materials needed
Materials needed:
-A pencil and paper
-An eraser
-A strong light source (a lamp or a sun light)
-A horse model
1. Start by sketching out your basic outline of the horse on paper. Start with the head, neck and shoulders first, then work your way down to the hindquarters. When you’re done, erase any unnecessary marks so that your drawing is clean and easy to see.
2. Next, take your pencil and begin marking out the horse’s body using broad strokes. Be sure to indicate the shape of each muscle and bone in the horse’s body, as well as any wrinkles or creases in its skin. Don’t be afraid to go back and make changes to your drawing as you go along – mistakes are part of the process!
3. Finally, focus your light onto your horse model and use it to create some shadows on its body. This will help define details such as muscles and veins more clearly. Play around with different angles and brightness until you get the exact effect you want.
How to do the Horse Drawing Tutorial
So you want to learn how to draw a horse, eh? Well, this is the tutorial for you! In this guide, we will show you how to do the horse drawing basics step-by-step. We will also tell you about some important tips and tricks that will help you improve your skills as a horse artist. Let’s get started!
Step One: Start with a basic outline of the horse’s body. Begin by sketching out a rough shape using simple lines and angles. Pay attention to the horse’s head, body, and legs. Feel free to add any details that strike your fancy. Remember that horses can vary quite a bit in size so be sure to take this into account when drawing your model.
Step Two: Now it’s time to begin shading the horse’s body. Use light and dark tones to create different areas of detail on the Horse’s body. Be careful not to overdo it though – a little shading here and there can really help bring out the details in your Horse drawing.
Step Three: Next, it’s time to start adding hair details onto the Horse’s body. Start by sketching in some basic guidelines for where each strand of hair should go, then work from there. Make sure to add realistic textures and shadows onto the hair for an accurate look!
Step Four: Finally, it’s time for highlights and shadows on the Horse’s skin. Use darker shades around the
What is Horse Drawing?
In horse drawing, the objective is to render an accurate likeness of a horse on paper. The basics of horse drawing are the same whether you are starting out or have years of experience. There are a few key points to keep in mind when creating a horse portrait:
1) Draw your outlines first – Start with simple shapes such as circles and rectangles, then add details such as eyes, nose, ears, and lips. Once you have your basic outlines sketched in, use thicker pencils to fill them in with darker colors.
2) Use light and shadow to create depth – Use light strokes to highlight areas of the horse’s body, while using heavy strokes to create shadows under the muscle groups and around the eyes. Use variations of these light and shadow strokes to create realistic details.
3) Pay attention to horses’ individual features – Every horse is unique, so be sure to capture their particular features accurately. For example, some horses have wide foreheads while others have narrower ones; some horses have long tails while others don’t; and some horses have horseshoe marks on their faces or backs.
What is a Horse’s Body Structure?
The horse’s body structure is made up of several different parts, including the head, neck, torso, hindquarters, and legs. Here’s a closer look at each:
1. Head: The head is composed of the skull and the eyes. The skull is made up of two pieces that fit snugly together: the frontal bone and the parietal bone. The eyes are located in sockets in front of the skull and can rotate around it.
2. Neck: The neck is quite long compared to other body parts and has several muscles attached to it that help control movement. It also contains some blood vessels that supply blood to other parts of the horse’s body.
3. Torso: The torso consists of several sections that move independently of one another. These include the chest, which contains organs such as the heart and lungs; the back; and the shoulders, which allow for great range of motion.
4. Hips: The hips are located behind the torso and contain three bones—the femur (thighbone), tibia (shinbone), and fibula (anklebone)—that work together to provide movement during locomotion.
5. Legs: The legs are composed of four bones—the fibula, tibia, femur—and two joints between them: the stifle joint (between the tibia and fibula) and hock joint (between the femur and fibula
How to Draw a Horse’s Head
Step 1
Draw the basic outline of the horse’s head using a thick line. Make sure to pay attention to the horse’s shape and proportion.
Step 2
Start adding some details to the horse’s head. Start by drawing a few lines near the base of the nose and use these as guides for sketching in other features. Add a few lines around the eyes and mouth.
Step 3
Continue adding details to the horse’s head, using guidelines you created in Step 2 as a reference. Sketch in a mane and tail, and add any other markings or features on the horse’s head. You can also start to add color to your drawings at this point if you’d like.
How to Draw a Horse’s Neck
First, start by drawing the horse’s body outline using a basic oval shape. Next, add in the horse’s head using a smaller oval shape. Start by drawing the horse’s mouth and nostrils using small circles, then add in the ears using small ovals. Finally, draw the horse’s neck and mane using long, thin lines. Use a light pencil to lightly shade in each section of the horse’s body and head. Use a darker pencil to add more detail to the areas around the eyes and mouth.
How to Draw a Horse’s Shoulders
If you’re ever asked to draw a horse, this is the tutorial for you! Drawing a horse’s shoulders can be tricky, but with these steps it will be a breeze.
Start by sketching out the basic shape of the shoulder on your paper. Make sure that the proportions are correct – the shoulder should be significantly larger than the neck and body it’s attached to. Once you have your outline drawn, start filling in the details. First, define the muscles and veins on each side of the shoulder blade. Then add in some stubbly hair and other rough features like scars or dirt. Finally, finish up by adding light shadows to create depth and realism.
How to Draw a Horse’s Body
To start, draw the basic outline of the horse’s body. Use a light pencil or charcoal to lightly sketch in the outline of the horse’s body. Next, add in some basic details like the horse’s head, neck, and spine. Be sure to include any distinguishing features like a horseshoe on the horse’s nose or a mane and tail.
Once you have the basic outline and details down, it’s time to start adding in layers. Start by drawing in the horse’s fur texture with a thicker pencil or brush. Once you have that down, begin to add in other details like muscles and veins. Be sure to keep things simple at first so you can get a better understanding of how each layer affects your final drawing.
Once you’re happy with your Horse Drawing Tutorial, it’s time to finish up by adding in highlights and shadows. This will give your drawing depth and realism. Give your horse an eyeroll for good measure!
How to Draw a Horse’s Legs and Feet
When you want to draw a horse, there are a few things that you need to take into account. The first thing is the horse’s legs and feet.
To start, you will need to sketch out the outline of the horse’s legs with a light pencil. Make sure to include the angles, curves, and details of the horse’s legs. Next, use a darker pencil to add in some shadows and highlights to your drawing.
Next, it is time to create the horse’s feet. Start by drawing two circles on top of each other. Make them slightly smaller than the foot itself so that they look like they are attached to the leg. Then, go back and fill in all the details on each foot with a light pencil. Be sure to add in shadows and highlights where necessary.
Finally, it is time to add in some realism to your horse’s legs and feet by adding veins and other anatomical details using a dark pencil. Be sure not to overdo it though; you don’t want your Horse Drawing Tutorial looking too detailed!
Conclusion
In this horse drawing tutorial, we will walk you through the entire process of creating a basic horse silhouette. We’ll start with the head, and then move on to create the body, hooves, and finally the tail. By following these simple steps, you will be well on your way to becoming a talented equine artist!